Hello

Hello

Friday, March 25, 2016

Parmesan Quinoa Turkey Meatballs


Sounds fancy, don't it? I wanted to make a sophisticated meatball recipe that was healthy, yet full of flavor and also exciting enough that I wouldn't get tired of eating it repeatedly. I made this recipe for our meal prep this past weekend. And I outdid myself.

Here's what you need to do to make this meatball situation happen in your life:

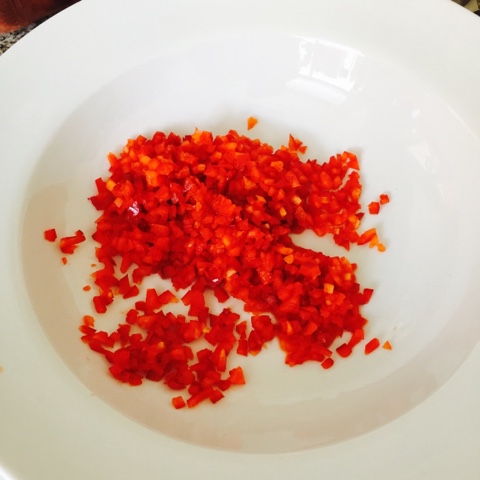
Mince a red bell pepper. 
You'll want a sharp knife for this (if you don't already have a sharp knife, invest in at least one good knife. It's so worth it). A dull knife is going to smash the bell pepper and you will have bell pepper mush instead of minced bell pepper. Gross. Toss those tiny minced pieces of bell pepper into a very large bowl.


Mince 5 cloves of garlic.
Or do what I almost always do and scoop 5 teaspoons of minced garlic (sold in convenient glass containers in the produce isle) into the bowl.


Still with me?

Mince a medium onion. 
If you're not a big onion fan you can use a small onion. And again, you want to really get those onion pieces as small as you can. Big chunks of vegetables will make the meatball fall apart. We don't want that to happen. That upsets us. 


Add 1 cup of cooked quinoa.
Oh dang, we're getting fancy.


Add 3 pounds of ground turkey.
Oh, did I mention this makes 12 servings? Like I said, I made this for our meal prep this past weekend. We make several servings of a few different meals. Click Here for more details about how I meal prep. If you don't want 12 servings I suggest cutting the recipe in half to make 6 servings. 


Add 2 eggs.
Dos huevos.


Add 1 and a half cups of grated Parmesan cheese.
That's a lot of cheese! The cheese really helps give these meatballs an amazing flavor.


Add 1 teaspoon of salt and 1 teaspoon of pepper. 
Keep in mind that the Parmesan cheese also contains salt, so if you want to keep the sodium level low (or if you prefer food with less salt), use less salt or just omit the salt altogether. You can always add it later when you're eating it if you need to, right?


Add 1 cup of freshly chopped parsley.
I love this part. 1 cup is ridiculous, right? This beautiful green and flavorful parsely is going to give your meatballs so much color and flavor.


Mix.
This is the messy part. Use your clean hands to mix all the ingredients together. You want to really get in there and make sure everything is combined.


Form meatballs, 3 heaping tablespoons in size.
They should be about the size of 3 heaping tablespoons. Don't drive yourself crazy trying to measure them perfectly. I used a tablespoon measuring spoon (and, full disclosure, I got a little obsessive trying to get exactly 36 of them because I wanted to have 3 per meal for our meal prep). The important thing is that they are all about the same size. So, with this recipe (if you did not cut the recipe in half), you should aim for about 36 meatballs.


Put meatballs in the freezer for 20-30 minutes.
This step is important. The meatballs are prone to falling apart, so you want to let them cool and even freeze just a little in order to maintain their round shape as you cook them. Place them on a tray or baking sheet lined with waxed paper and put them in the freezer.

Cook meatballs in olive oil over medium heat in a skillet.
This is the part where you babysit. First of all, you need a very large skillet in order to cook as many meatball as you can. You don't want to crowd them in the skillet. You will need to cook more than one batch. I used two large skillets and cooked a total of 4 batches of meatballs. Keep the rest of the meatballs in the freezer while you are cooking the ones that fit in your skillet (s).

Okay, now the babysitting part: like I said, these meatballs are prone to falling apart. I had 3 meatballs fall apart because I did not freeze my first batch and also because I moved them too much while they were cooking. So the key to babysitting is watching them closely to make sure they don't burn BUT to not flip them until they are brown and cooked enough to survive being flipped without falling apart. You may have some meatballs that fall apart as you are getting the hang of babysitting, but do not worry, deconstructed meatballs still taste great.


Preheat oven to 350 degrees Fahrenheit. Line a baking sheet with parchment paper. Remove meatballs from skillet when browned on all sides. Place on prepared baking sheet and bake for 30 minutes.
I used two baking sheets in order to bake all 36 meatballs at the same time. If you only have one you can certainly let half of the meatballs sit and wait on a plate while the other half is in the oven.

We served our meatballs with grilled asparagus and sautéed garlic balsamic mushrooms. Interested in meal prep? Check out my post about how to meal prep.


Clap for your damn self. You just made some fancy meatballs.
Okay, now try them. Do you love them? I hope so!


Parmesan Quinoa Turkey Meatballs

Yield: 12 servings, 3 meatballs each

1 red bell pepper, minced
5 garlic cloves, minced
1 medium onion, minced 
1 Cup cooked quinoa 
3 pounds ground turkey
2 large eggs
1.5 Cups grated Parmesan cheese
Salt, to taste (I used 1 Teaspoon)
1 Teaspoon ground pepper 
1 Cup fresh parsley, chopped 
Olive oil for cooking

1. Add all ingredients except for olive oil to a large bowl and mix very well with hands to combine.

2. Form approximately 36 meatballs, 3 heaping tablespoons in size, and lay on a wax paper-lined baking skeet or tray.

3. Place tray of meatballs in the freezer for about 30 minutes until meatball are slightly frozen on the outside.

4. Cook meatballs in olive oil in a nonstick skillet over medium heat until brown on all sides, turning carefully when they are browned with plastic tongs.

5. Preheat oven to 350 degrees Fahrenheit. Place parchment paper on a two baking sheets. Place meatballs on prepared baking sheets and bake for 30 minutes at 350 degrees Fahrenheit.


If you like ground turkey recipes, you'll love my Turkey Taco Salad.

Follow me on Instagram @howtogetawaywithcooking for more instructions and inspiration for cooking healthful and delicious foods.

Questions? Feedback? I would love to hear from you! Leave a comment below or email me at HTGAWC@gmail.com

Saturday, March 19, 2016

Wonder Pudding (Healthy Chocolate Pudding)


Oh...MYgosh! This pudding is really good! 

Non-dairy, gluten-free, refined sugar-free, no artificial anything! Sounds like it would be disgusting right? Wrong. This pudding is full of the good stuff: chocolate, natural sugars, and good fats.


This pudding works for The Whole 30 lifestyle and for the vegan lifestyle. It's also a wonderful dessert for babies 8 months old or older (but don't take my word for it: please consult with your pediatrician regarding feeding your baby solid foods).


Story behind Wonder Pudding: My in-laws were coming over for dinner this past weekend and I wanted to make them a dessert that was in line with their fancy new Whole 30 diet. I found a simple recipe that called for bananas and cocoa powder. Bananas, love 'em. Cocoa powder, love it. So yea, this recipe seemed liked it would work. 


But then...I found a baby food recipe for chocolate pudding that seemed even better (@babyfooduniverse on Instagram). The recipe called for the bananas and cocoa powder, and also an avocado, dates, and fruit juice. I was a little skeptical about the amount of avocado and dates, and also about the fruit juice. So I made modifications and gave the recipe a try. I tossed the ingredients into the Vitamix, and boom: chocolate pudding!


I chopped some raw almonds and toasted them in the toaster oven. I served the pudding in martini glasses sprinkled with the almonds and garnished with a thin slice of banana. My plan was to get the in laws to "taste it with their eyes" first, just in case they didn't like it. 

Well, they were very impressed by the martini glasses and the banana slice, but most of all they loved the taste of the pudding. They ate every spoonful! Daughter-in-law win! 

I think they loved it even more than my baby girl did!

I hope you love it too! 


Wonder Pudding

Yield: about 4 servings

1/2 large ripe avocado
4 ripe bananas 
1 cup cold filtered water
5 pitted dates 
4 Tablespoons cocoa powder

Combine all ingredients in food processor and process until smooth, then refrigerate. Serve chilled, topped with roasted nuts.


Follow me on Instagram @howtogetawaywithcooking for more instructions and inspiration for cooking healthful and delicious foods.

Questions? Feedback? I would love to hear from you! Leave them in the Comments section below or you can email me at HTGAWC@gmail.com.

Friday, March 18, 2016

Honey BBQ Tofu Jerky


If you're reading this I hope you're on your way to the store to buy some firm tofu!


This tofu jerky is delicious!

I've been so consistent with weekly meal prepping that I haven't done much cooking aside from that. Our refrigerator looks very neat and clean, full of our little storage containers full of pre-packed meals.

But then there was that random package of tofu that didn't make it into our meal plans. Since I hate wasting food I decided to do some tofu experimenting.

And I proudly present to you: tofu jerky!

I'd heard of tofu jerky before but never tried it. Now that I know it tastes so good, you can expect some more tofu jerky recipes from me real soon.

You'll love snacking on this meat-free jerky. It's sweet, tangy, garlicy - but not too garlicy - and a great vegetarian snack.

This is how you do it:

Remove excess water from tofu by pressing with a clean dish towel or paper towels. 


Slice tofu into thin rectangles then remove more water by pressing again. 

Mix marinade ingredients in a bowl and brush each side of the tofu with the mixture.


Allow to marinate in the refrigerator for at least 1 hour, but marinating overnight will yield more flavorful crisps!


Preheat oven to 325 degrees Fahrenheit.

Line a large baking sheet with parchment paper. Carefully place tofu onto the lined baking sheet. Bake for 20 minutes. Increase oven temperature to 375. Remove tofu and flip, then bake for an additional 15-20 minutes. Watch tofu closely to make sure the edges don't burn.


Remove from oven and allow to cool. The tofu takes on a jerky texture as it cools.


16 ounce package of firm tofu, pressed and thinly sliced
2 Tablespoon soy sauce
1 Tablespoon honey 
1 Tablespoon olive oil 
2 Tablespoons BBQ sauce
1/2 Teaspoons garlic powder

1. Mix marinade ingredients in a bowl and brush each side of the pressed, thinly-sliced tofu rectangles with the mixture.

2. Allow to marinate in the refrigerator for at least 1 hour or overnight.

3. Preheat oven to 325 degrees Fahrenheit. 


4. Line a large baking sheet with parchment paper. Place tofu rectangles onto the lined baking sheet. Bake for 20 minutes on the middle rack in the oven. 

5. Increase oven temperature to 375 degrees. Remove tofu from oven and flip over, then bake for an additional 15-20 minutes. Watch tofu closely to make sure the edges don't burn.

6. Remove from oven and allow to cool. The tofu takes on a jerky texture as it cools.


If you like tofu, you'll love my Garlic Tofu Steaks, or try my Italian Tofu, Peppers and Onions if you're in the mood for an Italian entree.

Follow me on Instagram @howtogetawaywithcooking for more instructions and inspiration for cooking healthful and delicious foods.

Questions? Feedback? I would love to hear from you! Leave them in the Comments section below or you can email me at HTGAWC@gmail.com.


Have fun!

Monday, March 14, 2016

Baby Food: Turkey-Kale-Chickpeas-Roasted Carrots (10 months)


I have no idea what to call this. And let's just be honest, it's looks gross. But I'm posting the recipe because my baby girl loves it! It's a great combination of nutrient-packed foods. 

I made this for my baby girl when she was 10 months old. You might chose to offer this combination earlier or later than that, but please always consult with your pediatrician regarding introducing foods to your little one.

Ingredients:
Cooked lean ground turkey
Cooked organic kale leaves 
Roasted organic carrots
Canned organic chickpeas


How to:
I cooked my turkey in a little olive oil, boiled my chickpeas in water, steamed my kale in a steamer basket, and roasted my carrots with a little olive oil in the oven (along with several other vegetables that I'm using to prep my baby's meals this week).


I placed the ingredients in my Vitamix with purified drinking water and blended to my desired texture (baby girl likes it chunky). I started out with about 1/2 cup of water and added more as I blended. No measuring cups were involved in the making of this puree. I definitely recommend using your own creativity and your baby's preferences in deciding the ratios. That's the fun part!


Let's blame daylight savings time for my lack of detail in this post. I want my hour back! 
 
Anyway, have fun!

Follow me on Instagram @howtogetawaywithcooking for more instructions and inspiration for cooking healthful and delicious foods.

Or on Twitter @HTGAWC, even though I don't quite understand how to use Twitter...

Questions? Feedback? I would love to hear from you! Leave them in the Comments section below or you can email me at htgawc@gmail.com

Saturday, March 12, 2016

How To: Meal Prep


People choose to meal prep for many different reasons. As for me and my little family, we find that it helps us to:

1. Eat healthfully,

2. Avoid overspending on food, and

3. Use the time that would be spent on daily cooking and cleaning the kitchen on doing other awesome things.


I'm going to share with you one example of meal preparation. Depending on your needs/wants/diet/budget/lifestyle/etc., there are several different ways to tackle weekly meal prep. This is how my husband and I prepped all of our meals for this week.

First of all, this week's prep was soooo much easier than our prep from last week. Last week our meals were great, they just took way too long to prep. My handsome husband had the marvelous idea of having chicken with every big meal and pairing it with different vegetables.

Here's our Meal Plan:

2 people
6 days
12 breakfasts
24 big meals (lunches and dinners)
24 snacks (2 snacks daily)


BREAKFAST: full fat yogurt sweetened w/Splenda, Crunchy Cranberry Almond Granola, banana

SNACK ONE: carrots & celery, peanut butter, cuties

SNACK TWO: strawberries & pineapples, turkey slices & sharp cheddar

We have 3 different options for our 2 big meals (lunch and dinner) each day.

To get 24 big meals, we prepared 8 servings of each of the following delicious entrees:

1. Grilled Chicken Thighs, Grilled Asparagus, Sautéed Balsamic Garlic Mushrooms and Brown Rice


2. Grilled Chicken Thighs, Steamed Broccoli and Brown Rice


3. Grilled Chicken Thighs, Collard Greens and Brown Rice


This is how we made it happen:


First, I made a meal plan and a shopping list. Then I went shopping to purchase the ingredients.


Then my husband and I high-fived each other and started cookin': 

My husband seasoned the boneless skinless chicken thighs and grilled them outside on the flattop grill, along with the asparagus. 


Meanwhile, I was inside cooking the vegetables, rice, and prepping the breakfasts and snacks.


I sautéed the mushrooms in a wok on the stove (with olive oil, onions, garlic, balsamic vinegar and a little salt and pepper).


I steamed the broccoli with a steamer basket in a large pot on the stove.


And the collards pretty much cooked themselves in a large pot on the stove (with olive oil, onions, garlic, chicken bouillon powder and water).


(Psst...there's a tablespoon of apple cider vinegar in these greens).


I steamed the brown rice in a medium pot on the stove.


Then I conquered the breakfast and snacks:

Breakfast: 
I put 1 cup of yogurt and 2 teaspoons of Splenda in each of 12 mason jars.
I baked the Crunchy Cranberry Almond Granola, and after it cooled and hardened I placed a 1/2 cup of granola into each of 12 snack bags 


Snack One:
This is the ridiculous part. Of course I have to be difficult and peel and cut my own carrots. Yes, I'm aware that they sell baby carrots at the grocery store. But I like mine better. I store my carrots and celery in water in the fridge and then put our portions in snack bags each night. I like for them to soak in the water for as long as possible to maintain that fresh and crispy crunch! So I peeled and cut my carrots and cut my celery and placed them in a big storage container full of water.


Then I grew the cuties on my cutie tree lol (one day...).


Then I placed about 2 tablespoons of peanut butter into little containers.


Snack Two: I washed, peeled and cut my pineapple into chunks and placed them into 12 snack bags. I washed and cut my strawberries in half and placed them into 12 snack bags (by the way, I buy generic brand snack bags because they are cheaper and, as you can see, I use a lot of them!)


I cut the sharp cheddar cheese into about 1 ounce chunks. 
(my math: the whole block was 8 ounces, so I cut it in half, then cut those halves into halves, then those halves into halves to yield 8 1-ounce chunks. That explanation was a blessing to someone, I just know it).
Then I cut each 1 ounce chunk into 4 little squares.
I placed 4 little squares into each of 12 snack bags with 4 folded slices of turkey.


Breakfast - done! 
Snacks - did that!

As I prepared our breakfasts and snacks I kept an eye on the mushrooms, tossing and stirring them as needed.

I set a timer for my rice so we don't have to eat mushy rice like we did last week (which actually wasn't so bad, but still...)

Then when all the foods were finished cooking and mostly cooled, we portioned out everything into our food storage containers.


So that's how we did it. Everything tastes amazing, I don't have to cook during the busy week, we are eating healthful, delicious foods, we are staying on our clean eating path, and it was fun working together. It was like a romantic meal prep date. Kinda.

My meal prep tips to you:

1. Keep it simple. When cooked well, leftovers are such a beautiful thing! Prepare one or two of your favorite big meals to last for the week. This week we prepared 3 big meals, as you can see, but we made foods that didn't require too much work.

2. Plan. Decide on the few foods you want to prepare, then create your shopping list. Remember to write down the amounts of ingredients you'll need so you'll have enough. Shop at a store that will give you the best value for the amount of food you plan on buying. If possible, create a plan that incorporates some of the foods that you already have. You can plan to prepare as much as you need/want. For example, prepare only your breakfasts and lunches for work; or only your dinners; or only your snacks; or prep for only 2 or 3 days out of the week instead of the whole week. Do what works best for YOU right now.

3. Teamwork. It makes the dream work. Two sets of hands get twice as much done than one. A third set of hands can bust some suds (a.k.a. do the dishes). And there will be lots of dishes. But four people...that's too many cooks in the kitchen! ;)

I hope this was helpful!


Follow me on Instagram @howtogetawaywithcooking for more instructions and inspiration for cooking healthful and delicious foods.

Or on Twitter @HTGAWC, even though I don't quite understand how to use Twitter...

Questions? Feedback? I would love to hear from you! Leave them in the Comments section below or you can email me at HTGAWC@gmail.com.

Have fun!